
An opportunity arose for me to experiment with RunwayML. Ive used it before for for very small tests and experiments but this required me to understand how their platform worked in much more depth.
I’ll be going over a number of experiments and workflows that I discovered, including what I found to be the most controllable and predictable workflow. Although after speaking with a Runway representatives, It sounded like its not how they intend for the tool to be used based on their target demographic. I’ll touch more on this at the end.
I’ll be going over Runway’s latest models:
- Gen 4: Text-to-Image
- Gen 4: Image-to-Video
- Gen 4: Aleph: Video-to-Video
These three models come under the naming “Gen 4”, however they’re three distinctively different models.
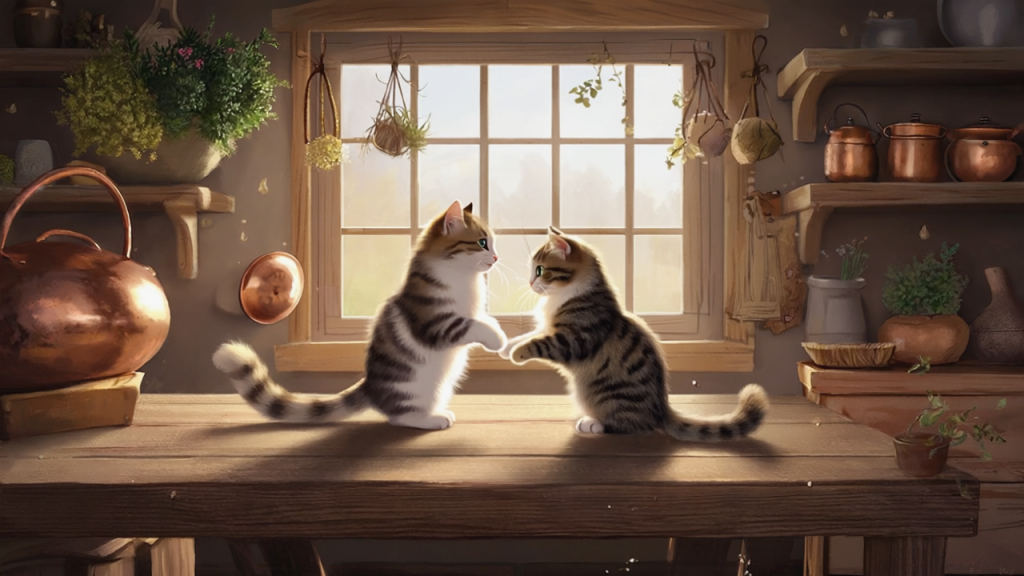
I’ll be experimenting initially with trying to generate a video of two cats wrestling on a table, and one cat knocks over a glass of milk.
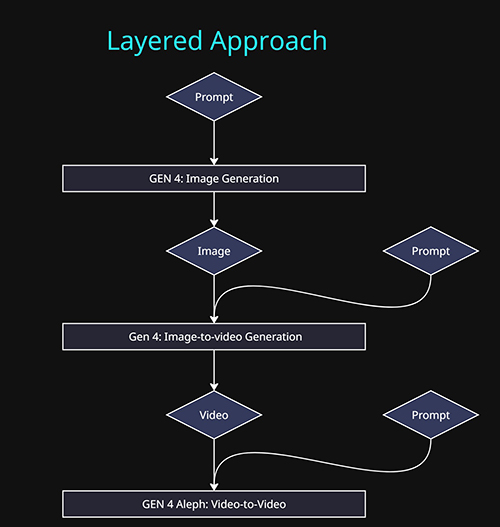
I found the most predictable and controllable approach was to layer together different tasks, by chaining the output of one model into the input of another, This can help simplify what we are trying to instruct the model to do at each step.
- Stage 1: Generate the base image: This determines the look and style of the video. Subjects, Scene , Style etc.
- Stage 2: Generate motion – subject motion, camera motion or scene motion.
- Stage 3: Generate the glass of milk being knocked over.
Gen 4: Text-to-Image
This stage of the process is the most controllable and practical model to engage with. Text-to-Image models in general have been around the longest compared to video models and as result they have come a long way in that time.
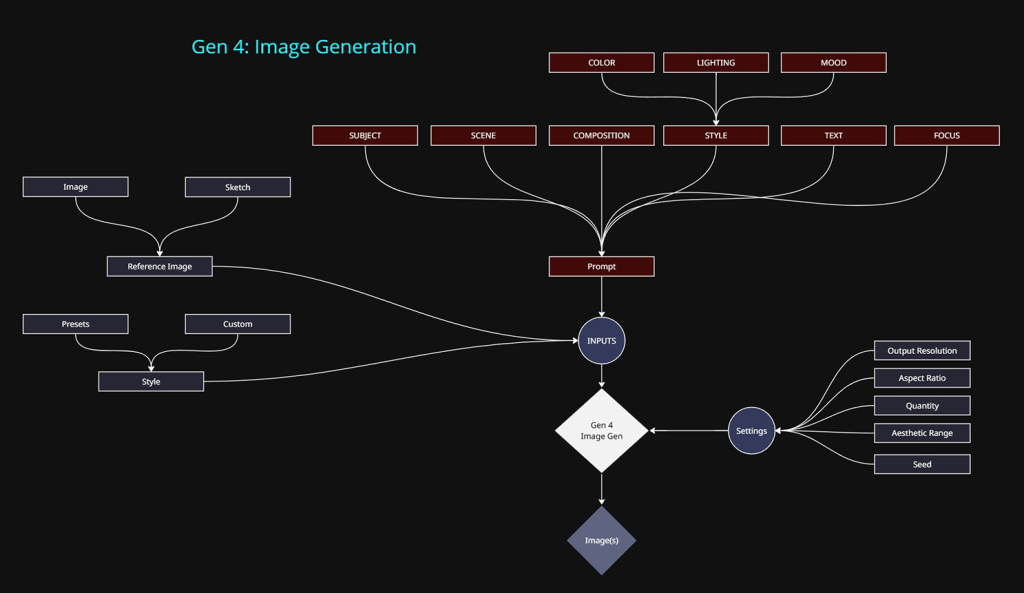
Methods of control:
- Text prompt: The primary approach.
- Reference images / Sketch (3 max):
- Input images or annotated sketches can be used. This can speed up the process by allowing image based data to take some of the heavy lifting away from text prompt input.
- I believe the model uses this data by a combination of deriving a text prompt based on the image content (image-to-text) and then injecting that into the prompt prior to image generation.
- The other would be using the image as the initial latent image and handling the noise/denoise/generation steps based on the text prompt given by the user.
- Style: This is simply a template of a text prompt that only describes what is considered “style”. Using the style presets or writing out the text prompt of the same key words will yield the same outcome. Its a convenience option. The only extra feature it will provide is the ability to vary the style based on the Aesthetic Range option. When outputting 4 images per generation, this will produce 4 images with different interpretations of the style.
- Output resolution: 720p/1080p only
- I stuck with 720p as the video models only accept 720p as input. If anything else is used, downresing kicks in.
- Aspect Ratio: Multiple options are available, which either use the above resolutions or lower.
- Quantity: 1 or 4 images at a time.
- Seed: This was a major flaw for me, the seed can be locked in the UI, but it does not reproduce the same result. Using the same seed and same inputs got me new version and outcome. Which in my opinion makes it a much more unreliable system to use in professional contexts.
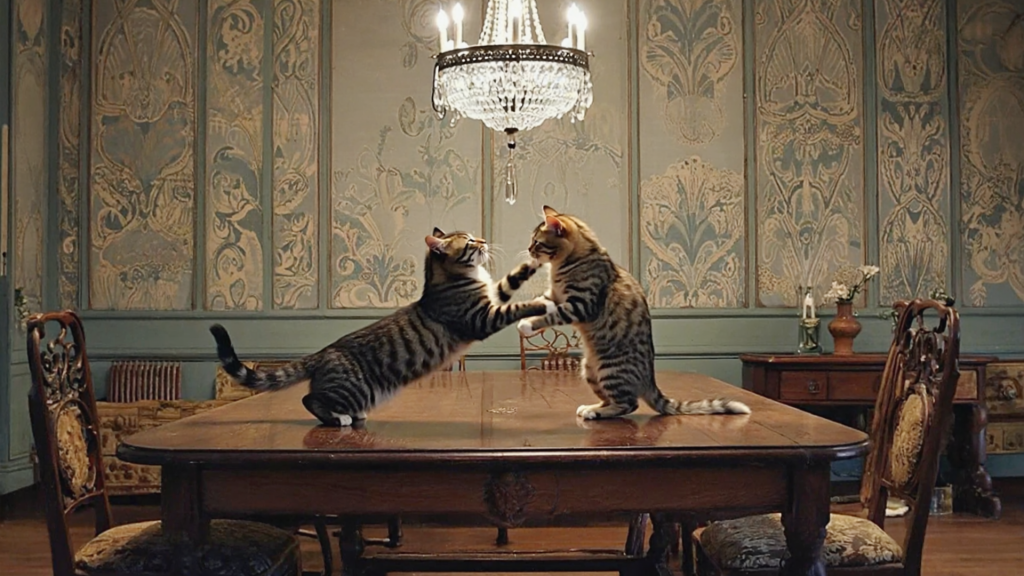
Below are my two base images that I will be testing with. I used the below prompt for the realistic version, a similar prompt was used for the stylized version. Both are using different style prompts. The step is by far the easiest and most controllable compared to the following steps.
Text Promt:
Subject: Two tabby cats with distinctively different patterns and colors engage in playful combat atop a dining table. One cat stands upright while the other stretches forward about to attack.Scene: An elegant dinning room.
Camera: A wide shot at at eye level with the cats.
Gen 4: IMAGE-TO-VIDEO
Now that we have our image we can start to think about motion. The image will be used as the initial frame for the video.

Methods of control:
At this stage we only want to be describing motion in our prompt
- Input Image: The primary input. All images are reformatted into 720p to comply with the video models resolution limit. The aspect ratio can vary but it will still be 720p equivalent in total pixels.
- Text prompt: Required input.
- Subject Motion: Movement of the cats
- Camera Motion: Locked Camera, Dolly In etc
- Scene Motion: Movement to any objects within the scene.
- Style Descriptors: Stop Frame Animation, Time Lapse etc.
- Aspect Ratio: Multiple options are available, which roughly equate to a maximum resolution of 720p.
- Duration: 5 or 10 seconds are available.
- Seed: Again, This was a major flaw for me, the seed can be locked in the UI, but it does not reproduce the same result. Using the same seed and same inputs got me new version and outcome. Which in my opinion makes it a much more unreliable system to use in professional contexts.
The look and style of the video will be extracted from the image itself.
The below text prompt was used for both the stylized and realistic versions. This step required a ton of experimenting and even after exhaustive trail and error, the results are impressive but far from perfect.
Text Prompt:
A locked off camera captures two cats engaging in a energetic wrestling match on a table. The cats roll and spin.
Realistic Version:
Stylized Version:
For this version, the placement of the glass of milk was added separately with the image-to-image model, as I was experimenting with a slightly different approach.
Gen 4: VIDEO-TO-VIDEO
At the time of writing this, Gen 4: Video-to-video was Runways latest model. This is usually referred to as “Aleph”. It has loads of hype circling the net. It has some pretty amazing capabilities but its still a struggle to stumble upon those outcomes by what feels like accident or brute force experimentation.
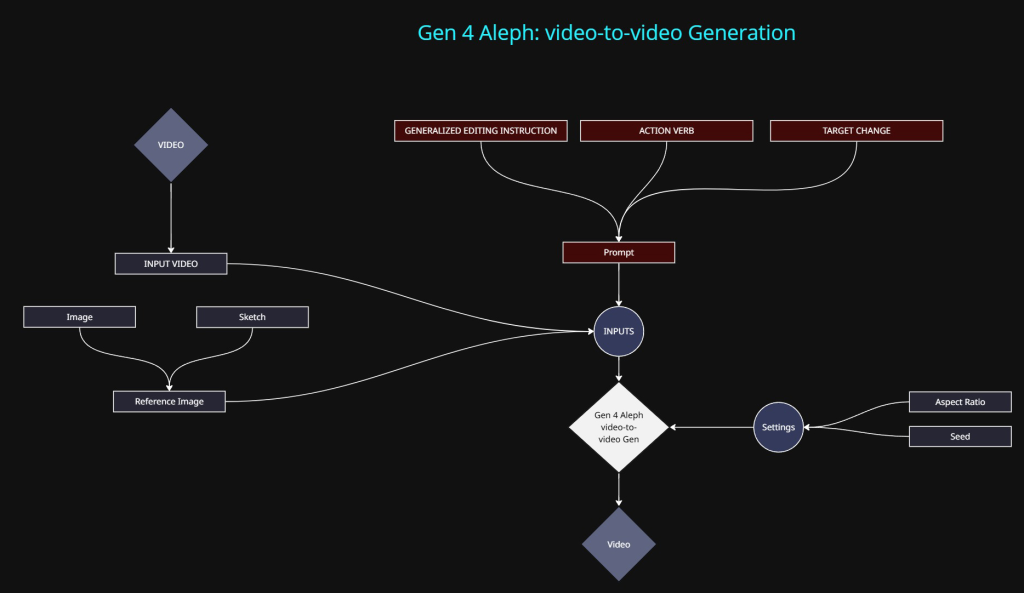
Methods of control:
- Input Video: The primary input. All videos are reformatted into 720p to comply with the video model resolution limit. The aspect ratio can vary but it will still be 720p equivalent in total pixels.
- Text prompt: Required input.
- The text prompt for this particular model appears fairly on ended, documentation is minimal. It basically just states that you need to specify an action along with the target outcome. “Change the colour of the car to red”
- Reference images / Sketch (3 max):
- Input images or annotated sketches can be used to help describe what changes need to be made to the video.
- Duration: 5 seconds are is only available at the time of writing.
- Seed: Again, does not work in the way you would expect the seed to function.
At this point we only need to get a cat to knock over a glass of milk. This part was by far the most tedious and frustrating. Personally I found it almost impossible to achieve. The below results are the closest I could get and I achieved the results differently for each version.
Realistic Version:
This is the best outcome I managed to achieve, I did so by supplying essentially an animated annotation that helped described to the model what I wanted to achieve. Any other method I tried resulted in a visual mess.
Note: I could not manage to get the glass to tip over and spill. After trying a TON of different methods and prompts, the results produced were all broken and not successful.
Below is the animated annotation I created in Nuke. The motion of the red glass isn’t great but it was enough for testing.
This version with the red animated glass is what I used as my video input into the video-to-video model along with the following prompt:
Text Prompt:
Replace the red glass shape with a small glass of milk. The glass of milk follows the motion path of the red glass shape. The glass of milks fly’s off screen to the right
Technically it does what I hoped, but it still lacks a lot of control.
Stylistic Version:
A different approach was taken with the stylistic version. In this version a glass of milk was added at the image stage. This was an attempt to try and see if I could achieve the glass being knocked over along with the milk. The following prompt was used:
Text Prompt:
At the end of the video, the cat’s tail pushes the glass over . The look and composition of the video remains the same.
This was visually the least problematic version I could produce, the process was very tedious and time consuming to get to this point.