
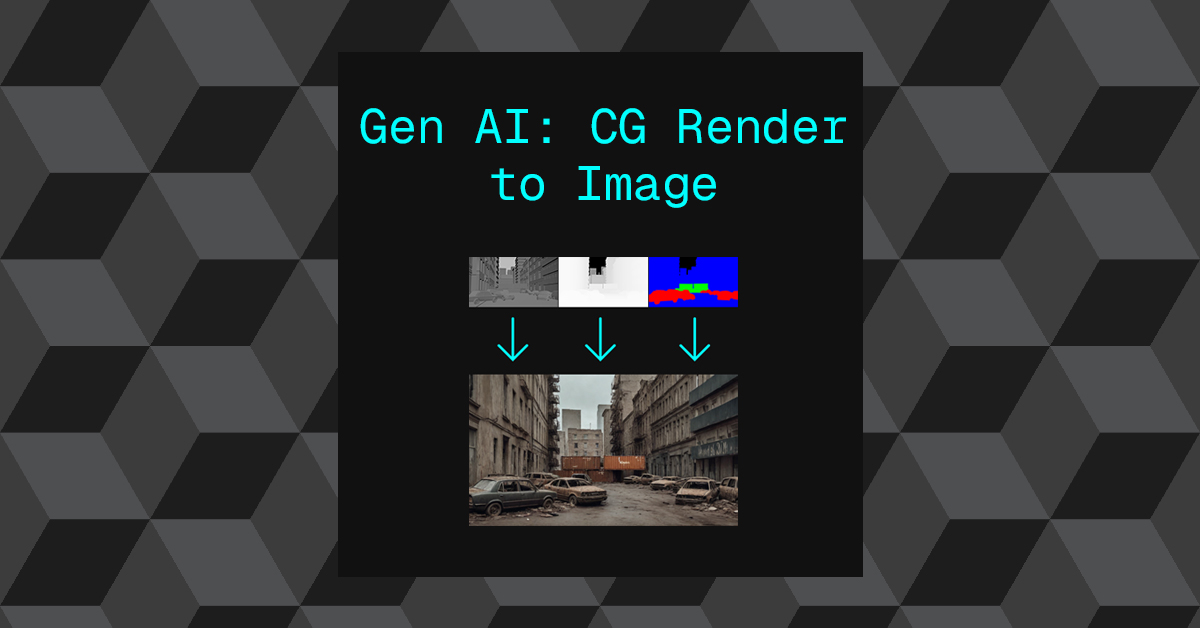
Generative AI only really becomes useful in a professional context, when it is controllable or art directable with enough fidelity to meet the client’s demands. Which is why this workflow piqued my interest some time ago.
What this workflow allows you to do is input a very basic greyscale render and then leverage a diffusion image gen model to apply textures, look-dev, lighting and additional details based on the layout, composition of the original render.
In a conventional CG pipeline, This would require a large amount of resources. So the prospect of being able to use a workflow like this to speed up the process is interesting.
Essentially, we are taking a crude render from the layout stage and bypassing all down stream departments from there.
Note: The workflow isn’t new at this point, but I’m finally getting around to adding it this blog.
I’ve used three different packages in this workflow:
- Houdini: CG scene creation & renders
- Nuke: Image pre-processing (Depth re-mapping)
- Comfy UI: Stable Diffusion
The following models and custom nodes are required:
- Checkpoint: juggernautXL_v7Rundiffusion.safetensors
- Visual Auto Encoder: sdxl_vae.safetensors
- ControlNets:
- depth-zoe-xl-v1.0-controlnet.safetensors
- control-lora-canny-rank256.safetensors
- Upscaller: 4x-UltraSharp.pth
- Custom Nodes:
- comfyui_controlnet_aux
- WAS Node Suite
Workflow
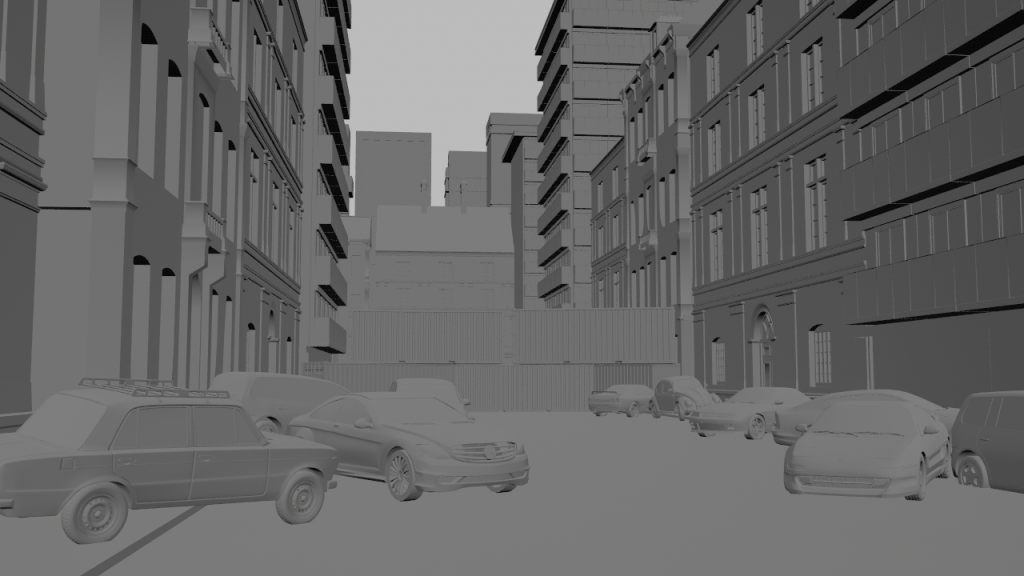
- Create a really simple 3D scene in a standard CG package.
- Render out the beauty along with two utility renders: Depth and Mask IDs
- The depth render will need to be remapped from 0-1 to 1-0.
- 3D Packages will render values for 1 for the BG by default.
Comfy requires values of 1 to represent the FG.
- 3D Packages will render values for 1 for the BG by default.
Note: The geometry used in the render is missing a lot of detail, its a simple scene used for blocking.

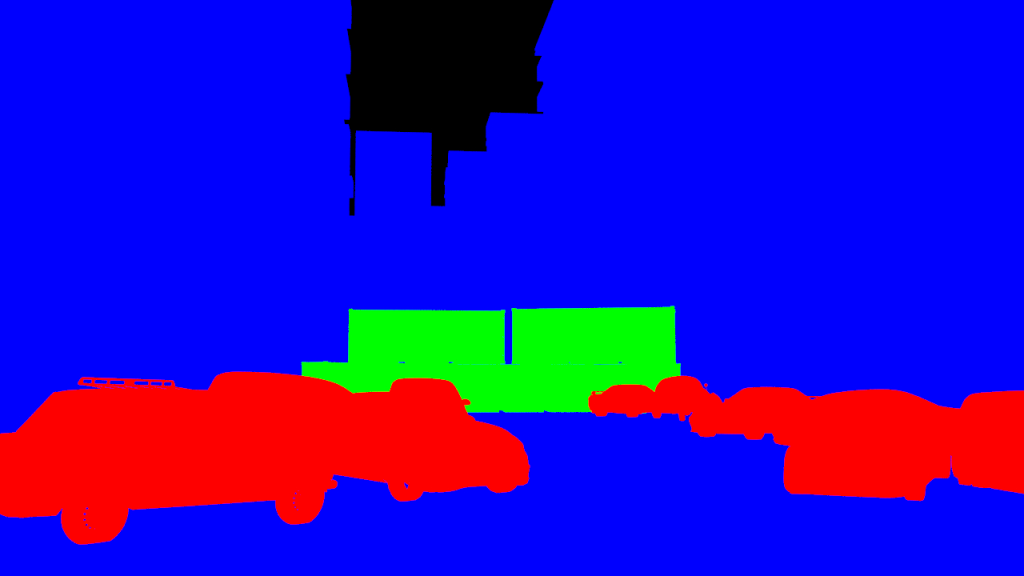
- These three images are all we need as our inputs.
- The workflow in comfy generates a new image that is guided by data either derived from or found in these three images.
- The style of the final image is determined by text prompts as you might conventionally expect.
- The main advantage of this workflow, is that it uses controlNets and masks to give greater control over the image than you would get from text prompts alone.
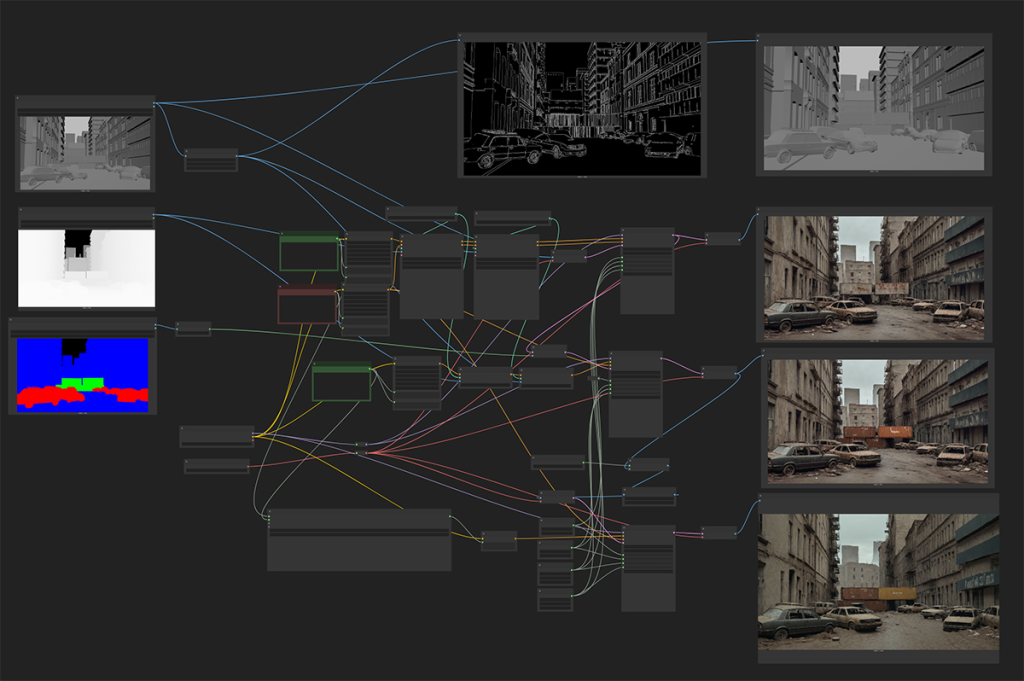
The above Comfy workflow has three main stages:
- Main Image Generation
- Masked driven adjustments
- Image Upscaling
Each of these stages achieved through a specific node network that is interconnected to allow necessary data to flow from each stage to the next.
Main Image Generation
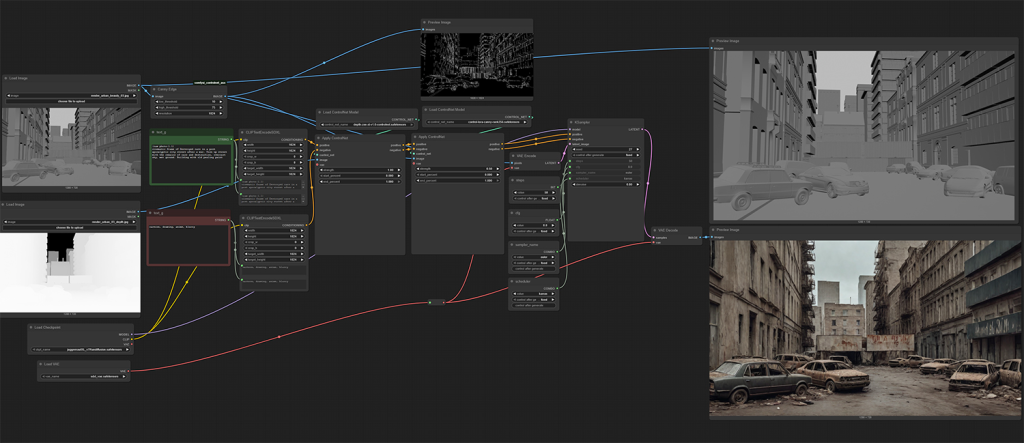
This is the main network of the workflow, it generates the base image. The output from this section of the workflow feeds into the network for the second stage and the output from that stage feeds into the third stage. This is essentially a non-destructive , layered workflow to the final image.
The main methods for controlling the image generation at this stage is the following techniques:
- ControlNets:
- Depth: This utilizes the depth render from our CG scene.
I’ve found it to have the most influence over the scene, compared to Canny. - Canny: This utilizes the normal render to derive an edge detect image. This is also used to help place detail that is found in the CG render.
- Depth: This utilizes the depth render from our CG scene.
- Image to image: The greyscale render is used to initialize the latent image and based on the level of denoising, This render as an input also contributes to the final image.
- Text Prompts: Both positive and negative text prompts are used to guide the diffusion process into the desired look.
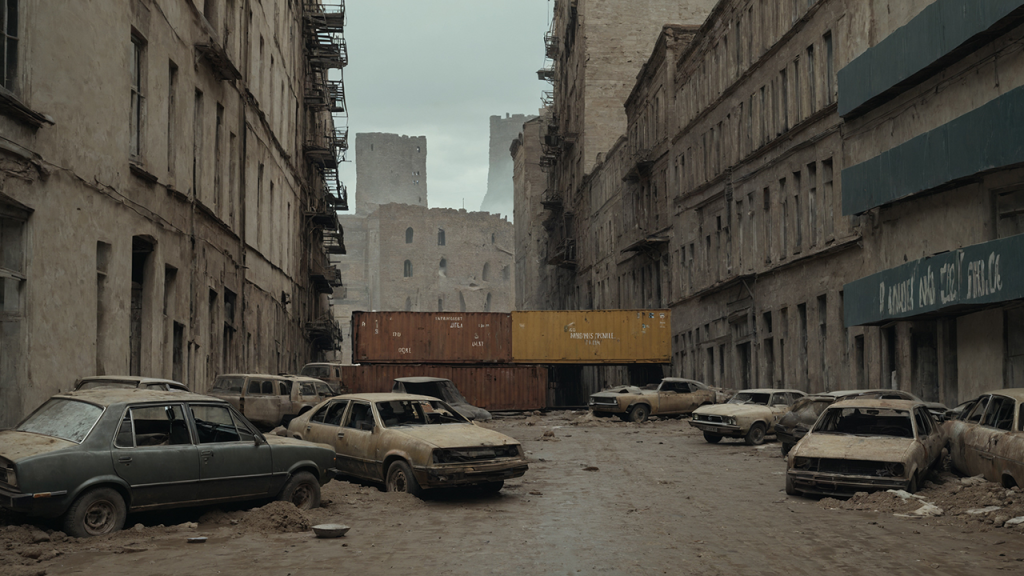
Below is the output from this initial generation step:
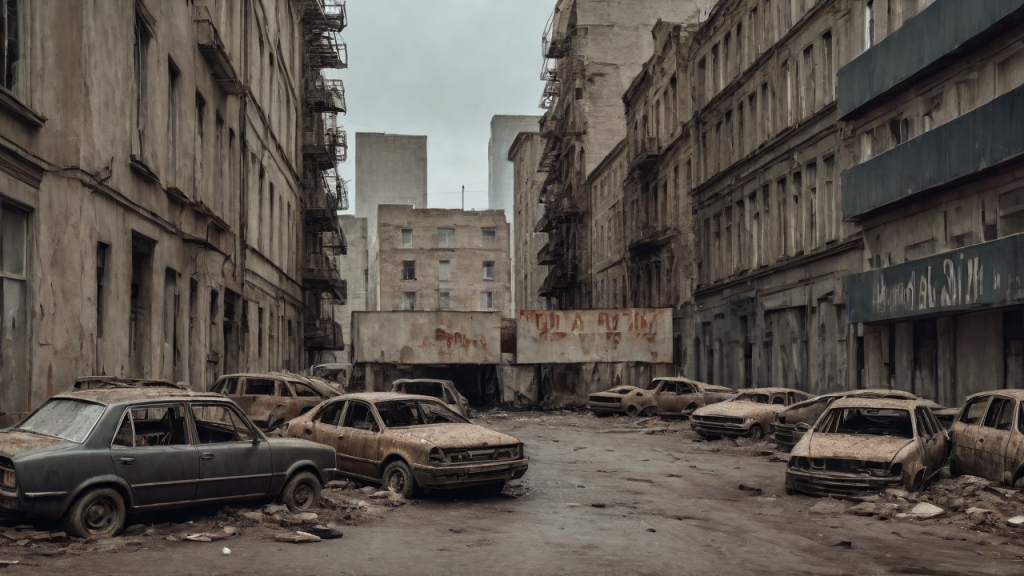
It’s not a bad start, not film quality by any means or photoreal but its could serve as concept art. The shipping containers are clearly not working well, which is what the next step is going to try and fix.
Masked driven adjustments
This stage is practically a duplication of the previous stage, with the one exception, It uses masks to only affect certain sections of the image. The latent image from the previous step is used as the initial latent image of this network.
- ID Mask: The mask ID image is used to apply a secondary text prompt to specific parts of the image for additional control.
A more tailed text prompt is used to generate improved shipping containers.
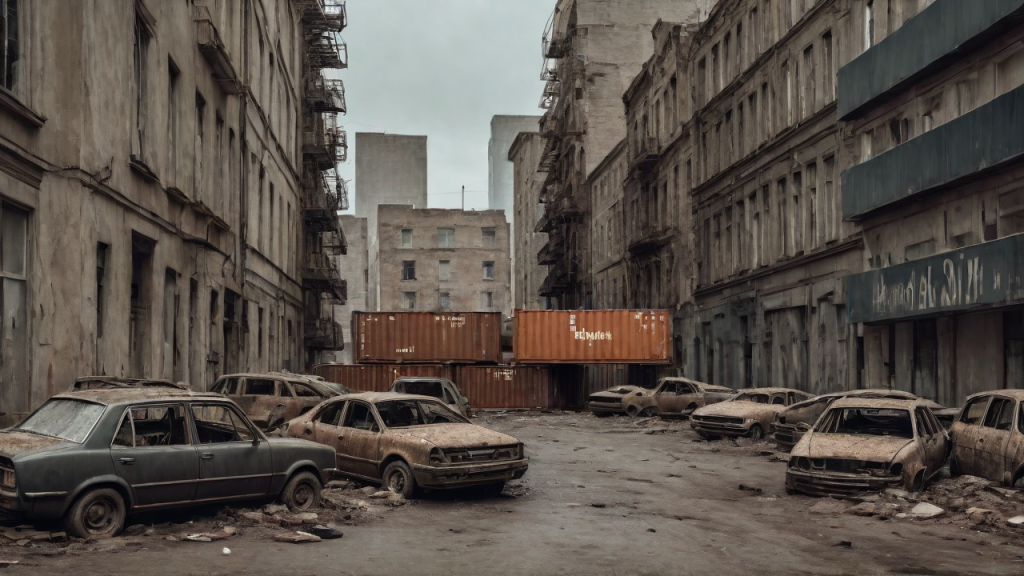
Image Upscaling
Up until this point, the images being generated have been 1280×720. The upscale model being used allows to increase the original image upto x4 the original size.
Simple Approach
Below is a simple approach of using the upscale directly on the image. This respects the original source image the most, however new detail is not being injected. We have the extra pixels and but it lacks detail.

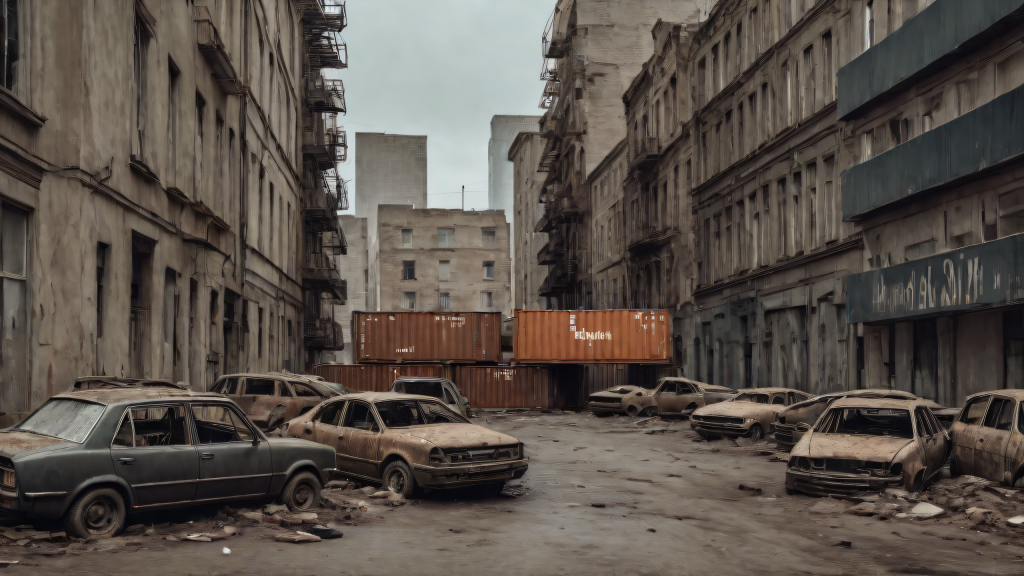
Re-generation Approach
Another approach to this, is to upscale the image then feed that larger image into a new image generation network, using the same prompts that were used to generate the source image.
This approach does give more detail, although it still lacking the level of detail and quality of a final image. The process inheritably changes aspects of the original as a side effect, which can give this workflow limited use cases.
COnclusion
When I discovered this workflow, it was the first time I had been genuinely excited about the use cases of gen AI in professional contexts. It allows you curate an image in broad strokes and then apply a huge amount of detail quickly.
Currently as this workflow stands, I can see it being useful for concept artwork and exploring different directions and looks quickly.
However there is still a long way to go before this particular workflow can be suitable for final images.
I need to find some time to explore any improvements that have developed in this area since I last looked at this workflow.